The platform’s management tool is the most efficient, user-friendly, and flexible Bitcoin mining management platform ever built.
ASIC Management tool is a pool-agnostic solution built for large-scale mining operations and energy companies to manage their distributed sites, teams, ASICs, and earnings through one dashboard. It is simple enough for at home miners to install and configure as well. The tool can be accessed over a web browser or via apps on Apple and Android mobile operating systems. APK files are available for Calyx or Graphen mobile operating systems. Pool earnings and farm management can be done in one place. No need to hop from a pool website or app then to a management app for another task. ASIC Management includes
- 3-level site maps
- Sub-accounts and self-serve dashboards
- Role-based team management
- Scheduling and curtailment
- UnderClock, OverClock, stop, and start ASICs
- PDU SNMPV2 support
- ASIC Tunneling
- Ant Space Container Monitoring
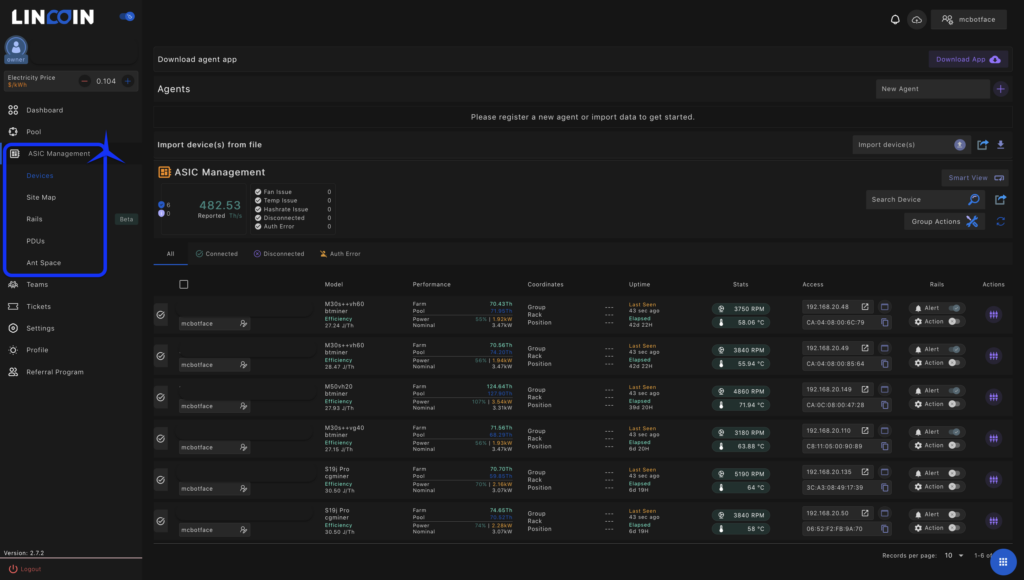
The Asic Management Tool can be accessed via the left hand column under “Pool”. There are five cards or tabs:
- Devices
- Site Map
- Rails
- PDUs
- Ant Space
Major functions of the Agent Tool are illustrated below.
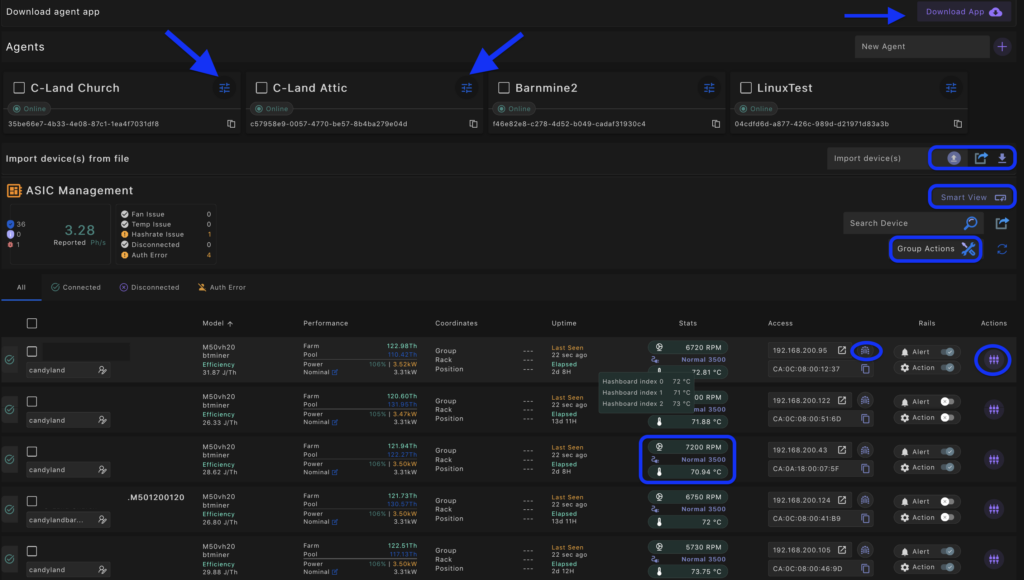
Devices
The Devices card on the left hand column, under the “Asic Management” header (Fig. 1) is your go-to for major farm management functions. If you have Lincoin Agent installed locally farm data will be available to view and execute various actions on the platform. A guide on installation and creating a connection via Agent Tool can be accessed here. Take the time to familiarize yourself with this screen as the majority of time will be spent here as part of day-to-day management. Major components of the column headers and their functions on the Devices tab are discussed.
There is a lot to unpack here. This page is divided into three sections on the page. The upper portion, middle portion and the lower as follows:
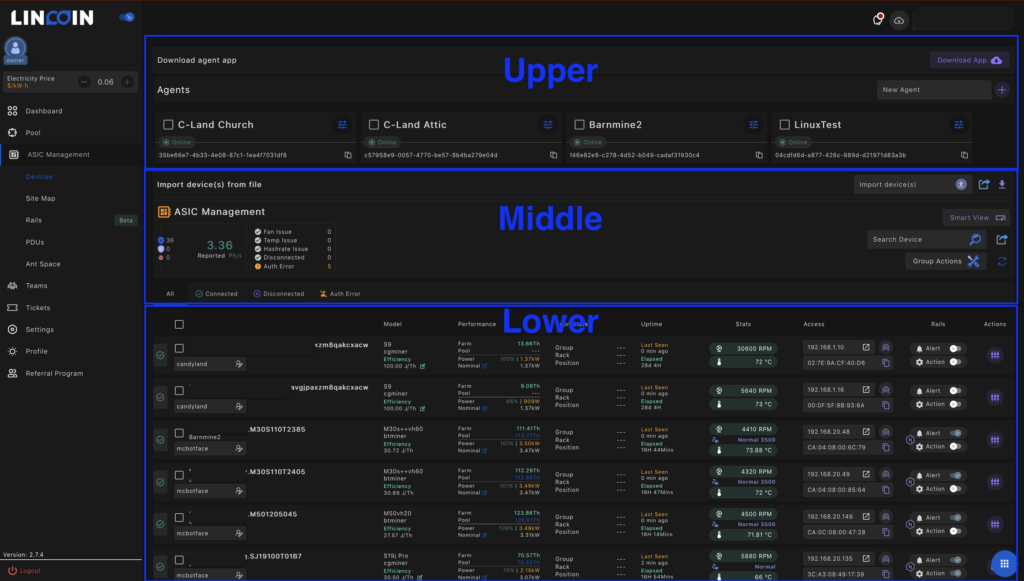
Devices – Upper
- The upper portion of this page includes a link to download the Agent App, Add Agent function, and active Agent data. Here users can add, delete and manage Agents. Agent is an application installed locally that pulls API data from devices and then compresses and submits the data to the Lincoin servers. It also performs commands received from Lincoin initiated by the user or a Rails command a user has set on identified devices. This section you can filter Agent worker data, download the Agent Tool, add a New Agent, and expand Agent tools with the selection of the Action button.

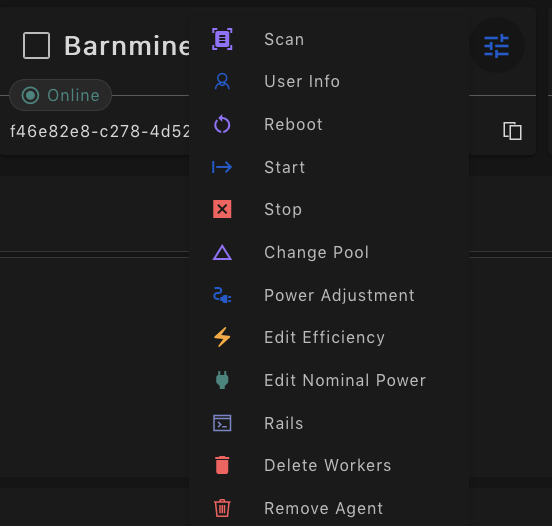
*Note: the Action button is available in all three locations in the Asic Management Page; Upper, Middle, and Lower. Notably the Upper Action button will execute for all workers under the respective Agent install. The Middle Action button is for selected Workers and the Lower Action button is for specific workers. The Action operations will be discussed in further detail after the Middle and Lower descriptions.
- Devices – Middle
The Middle portion of the Devices page includes the ability to Import Devices by File, Export Devices, Download Template, ASIC Management Data, Smart View, Search Device, Export, Group Actions, and Refresh Data.

Import Devices – In lieu of completing an automatic import via the Agent Scan function as previously discussed you can manually import workers via a CSV file. An export of the existing workers can be completed by selecting the Export button to the right of Import Devices. A template for the upload can be downloaded next to the Import Devices
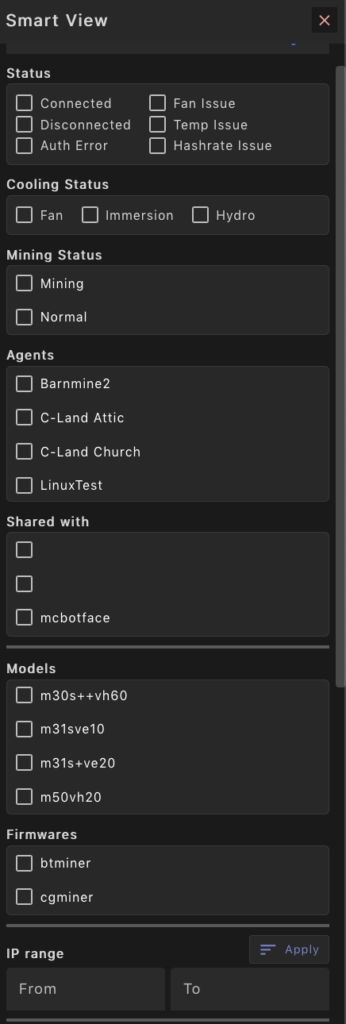
Smart View – Is a filtering tool of available workers. Take time to examine the filters as they can greatly reduce time for sifting through a large amount of workers for various reasons. Select the filter required and press Apply Filter at the bottom.

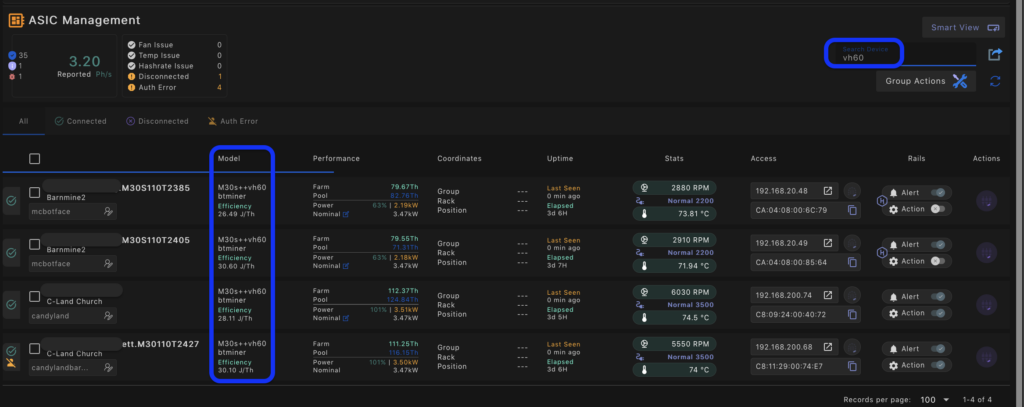
Search Device – This search box will filter by a number of column fields including but not limited to Worker Name, Model Number, IP Address, and Mac Address. In the example below we have searched for the Whatsminer with Models numbers including vh60. The results are as follows.
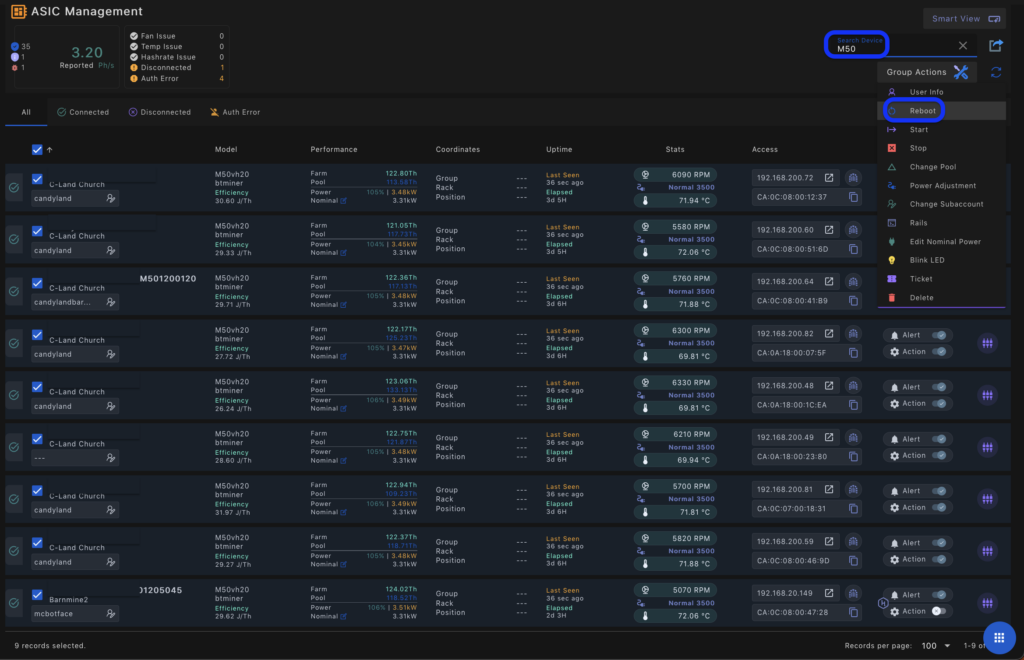
Group Actions – This is a bulk edit or execute tool. We will provide an example of rebooting all of the M50s under management. Note, there are many Group Actions to select from to include the items seen in the drop down below. Below is one example.
- Type in the Search Device box “M50”
- Select the required workers
- Select Reboot from the Group Actions button
- Devices – Lower
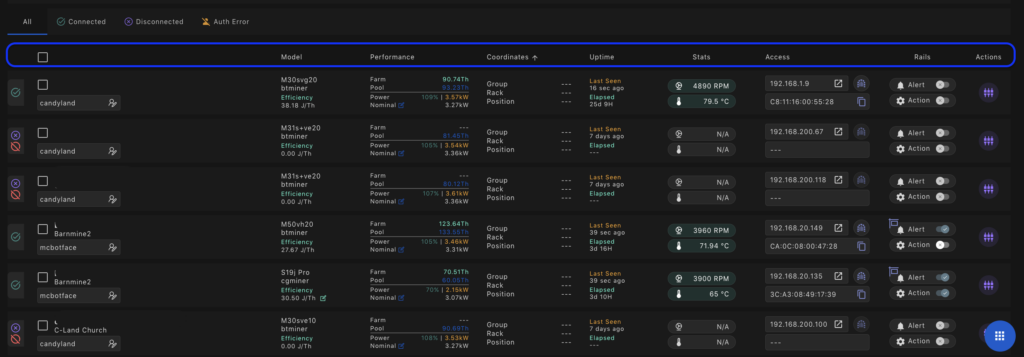
The lower portion of the devices tab is the main dashboard for monitoring workers, setting alerts and actions via Rails, and completing other actions. The columns include Worker, Model, Performance, Coordinance (rack locations if setup), Uptime, Stats, Access, Rails, and Actions. Below is an example of connected and disconnected workers. Rack space positions are not available. In this example we have not yet set up. The user can filter the first five columns.
Worker
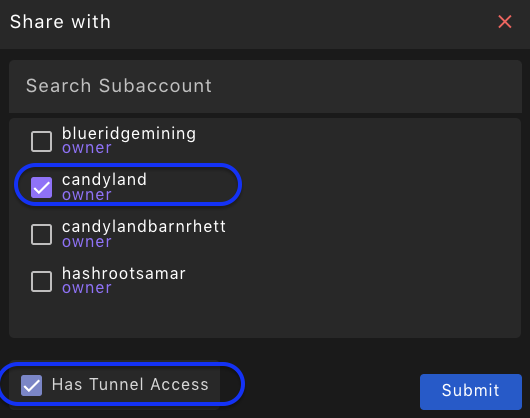
The worker column includes the worker name and connected Agent. Additionally, a share function for sub accounts. If there are sub accounts that need access to specific workers for monitoring or actions you are able to link them here. In this example we have selected a sub account to have access to this worker. Additionally, tunnel access to the worker can be enabled. This provides a direct connection to the worker IP remotely.

Model
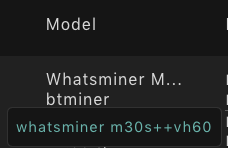
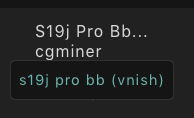
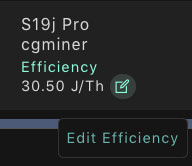
The model number provided from your workers API will be populated here. Whatsminer and Third Party Firmware will typically provide the worker model number and/or control board. The efficiency (W/TH or J/TH) will be calculated based on the reported API wattage/reported pool hashrate. Unless, you are running factory Antminer Firmware. In this case if you wish to see the estimated efficiency then you must hard input the wattage in the “Edit Efficiency” green checkmark box noted in the third figure below.
Performance
The Performance column can be sorted from ⬆ to ⬇ or ⬇ to ⬆.
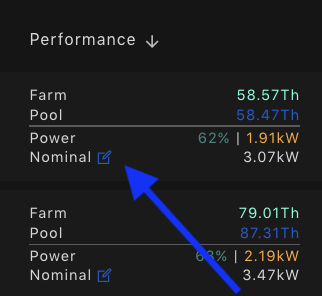
Farm Th – Displays the Farm terahash reading (API data).
Pool Th- Is the reported pool terahash, if Lincoin Pool is utilized. Note, pool terahash will not display if another pool is connected to the worker. That perk is available only hashing with Lincoin as the pool data can be shared with the Asic Management Tool.
Power- row will provide the API reported wattage. Notably, factory Antminer firmware does not provide wattage and would remain blank. However, most aftermarket firmwares will be displayed by the agent.
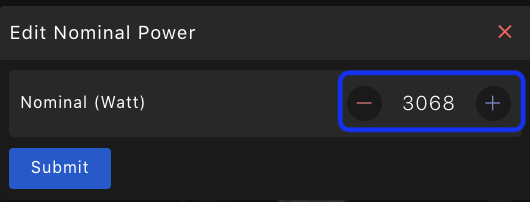
Nominal (Power) – Will be populated with a historical estimate of power consumption unless your hardware API does not provide wattage. In this case you may want to add or edit the nominal wattage. You can select the edit button as illustrated below and edit the wattage. The example below shows this worker operating at 62% of its historical wattage. This unit is running in a low power mode.
Coordinates
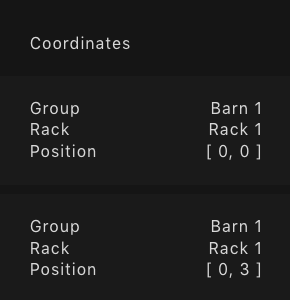
The Coordinates column will provide the position of the worker if the Site Map has been configured. It will indicate the workers Group, Rack, and Position.
Uptime
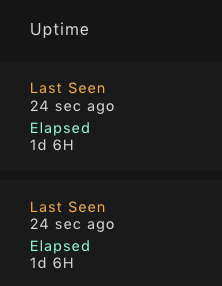
Uptime indicates the time the worker was Last Seen and the Elapsed Uptime of the worker.
Stats
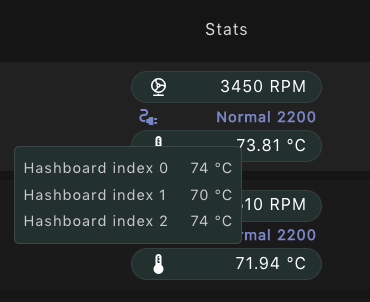
The Stats Column provides API data that is available via the Agent Application. Listed in this field includes RPM; inlet/outlet fan speeds, power mode indicator, and average chip temperatures.
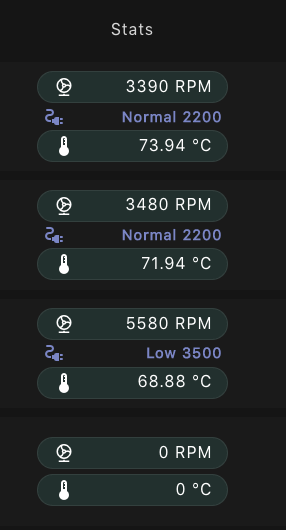
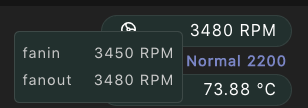
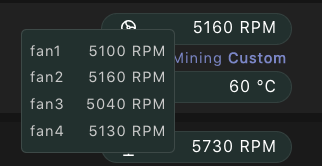
RPM – Depending on the worker used it will display two or four fan speeds. If the cursor hovers over the RPM you can see the inlet/outlet speeds as illustrated below.
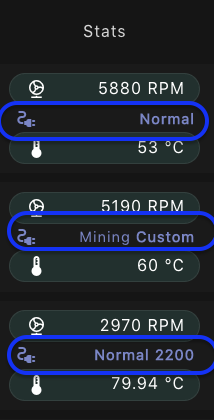
Power Mode – This layer will let the user know what power mode or adjustment, if any has been made. In this example the first worker is running in low power mode. The second worker is in Normal Mode on Cryptomine Firmware. The third worker is a Whatsminer running in normal power mode with a wattage adjustment.
Hashboard Temperature – This field averages out reported hashboard temperatures from API data.
Access
The Access column allows for local access and remote tunneling. The worker IP and MAC address is listed here. For local access click the IP address and a browser window will open for direct access to the worker. Or, copy and paste the IP address into a browser.
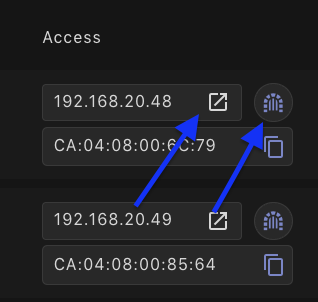
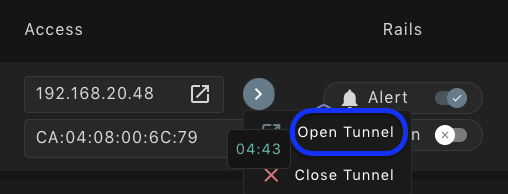
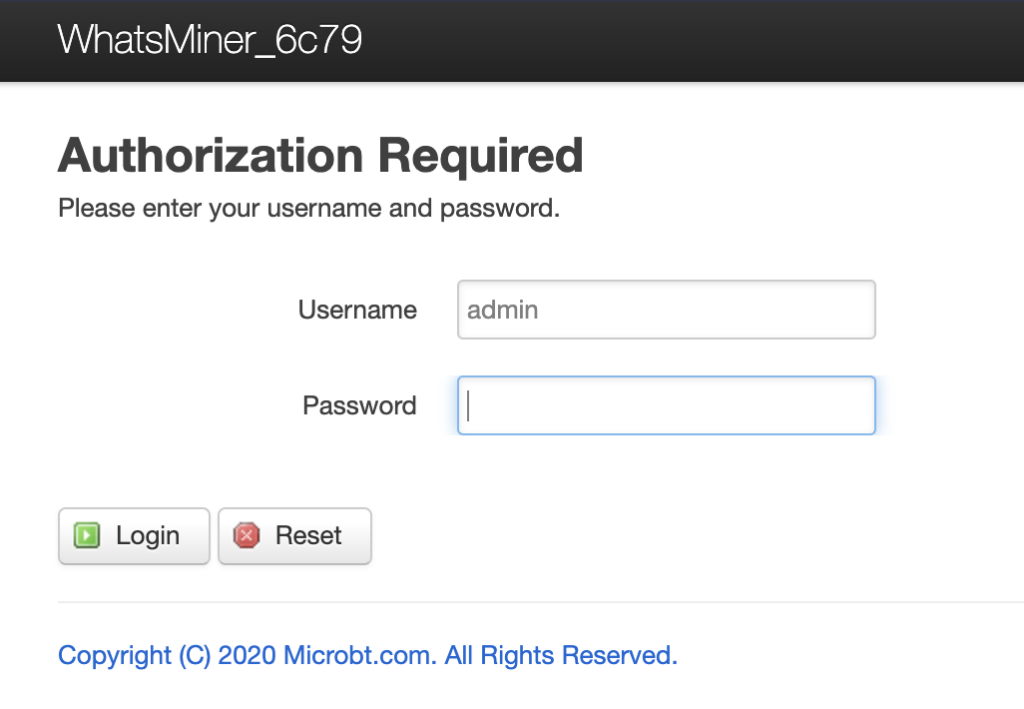
For remote access select the Tunnel Icon to initiate a 5-minute tunnel. Once the tunnel is created a timer will be present. Press the tunnel again to open a browser window for access.
Rails
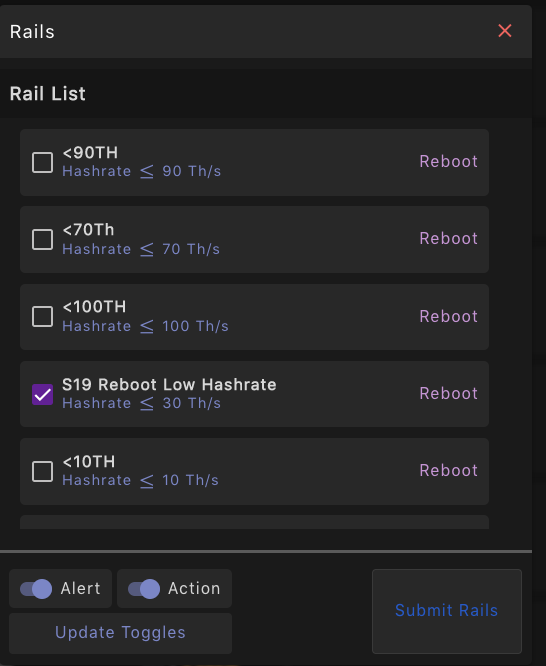
Rails is a tool within Asic Management that automates operations, optimizes hashrate, and allows users to trade energy. Rails software solution enables bitcoin miners to run sophisticated algorithms through an easy-to-use user interface. Rails integrates real-time data from over 20,000 grid nodes in 9 deregulated electricity markets in the US and Canada. Miners and energy producers can automate tasks for large-scale operations, maintain the health of devices, adjust the energy use algorithmically under and over-clocking ASICs, and protect profit margins based on real-time bitcoin price and network stats. Rails is compatible with Bitmain and MicroBT ASICs.
Rails will allow miners and energy producers to automate tasks for large-scale operations, adjust energy use algorithmically under and over-clocking ASICs and protect their profit margins based on real-time bitcoin prices and network statistics. Rails is discussed in further detail in its own section of the Knowledge Base Section.
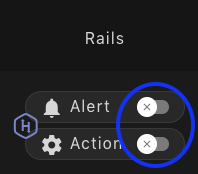
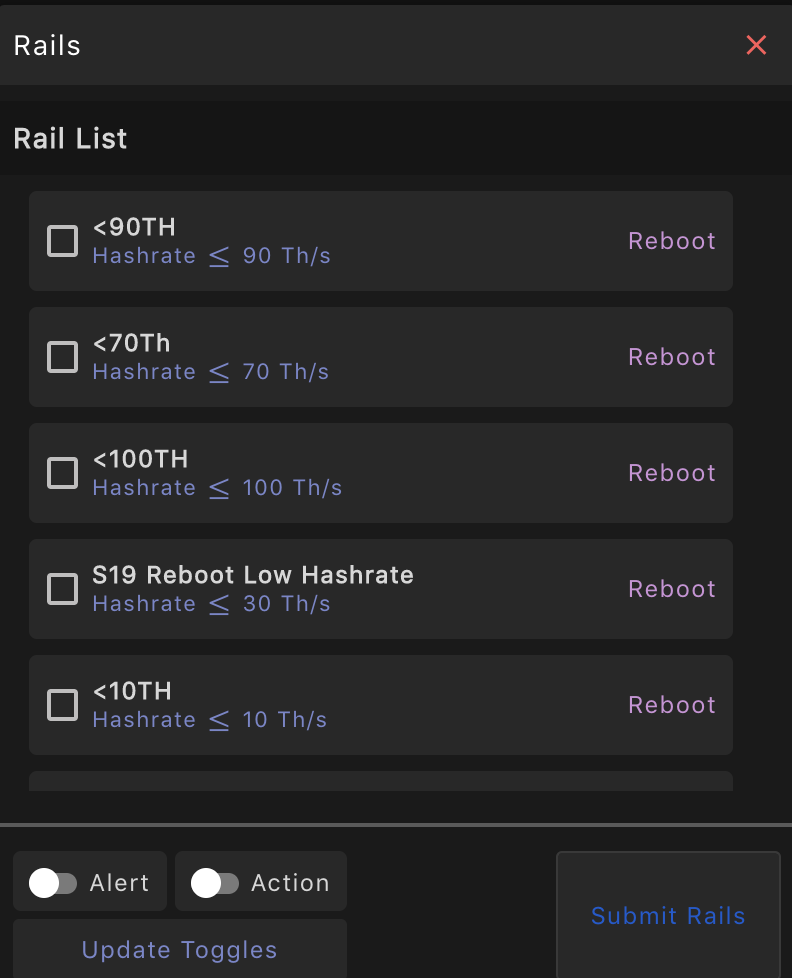
To use this column function you must have a Rail setup for use prior to enabling a Rail selected in the action column to the right of this column. The gear icon on the left image below indicates a Rail has been set up.
Actions
The action button expands the major tools or settings available. These include Scan, User Info, reboot, Start, Stop, Change Pool, Power Adjustment, Edit Efficiency, Edit Normal Power, Rails, and depending on where selected, Delete Worker/Delete Agent, Blink LED, and create a Ticket. The actions buttons are described in further detail below.
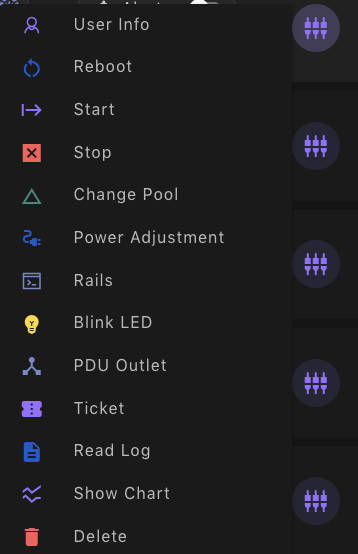
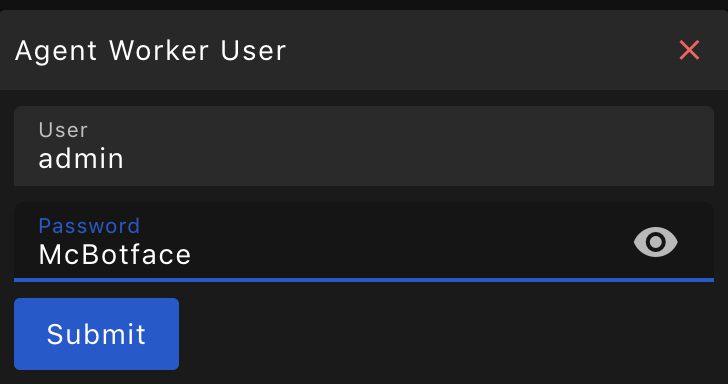
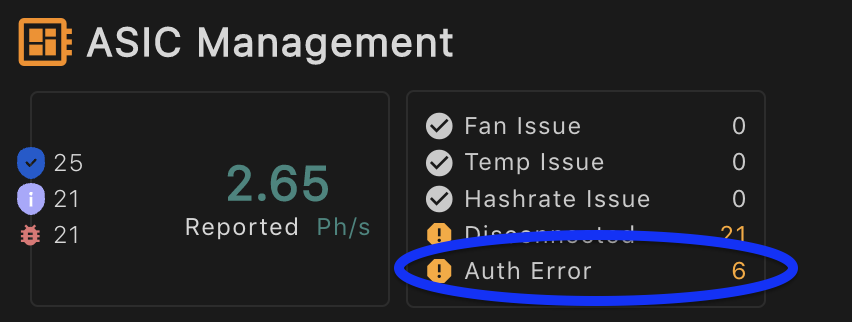
User Info can be entered in this field and allows login into the mining server. This can be necessary if your initial Agent IP scan had more than one password in a group or workers or the password to the worker was reset. *Note if the worker is locked (Authorization Error) the Actions are limited.
If you have any Authorization Errors in the Asic Management (middle) section or in the Worker Column select Info in the Drop Down and enter the login and password.
Reboot Need we say much more than the title? If a unit is limping along and needs a reboot here you go.
Start/Stop Same here you got this.
Change Pool Allows Pool Configuration.
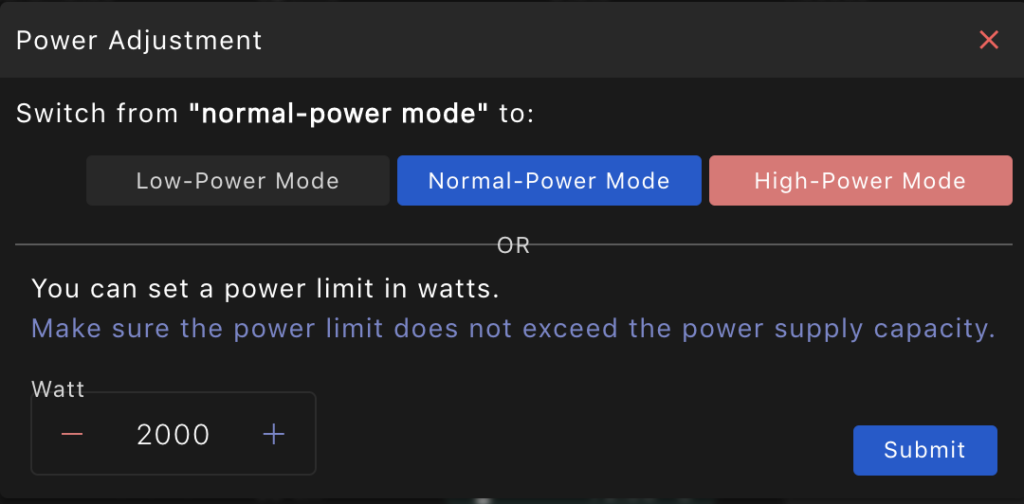
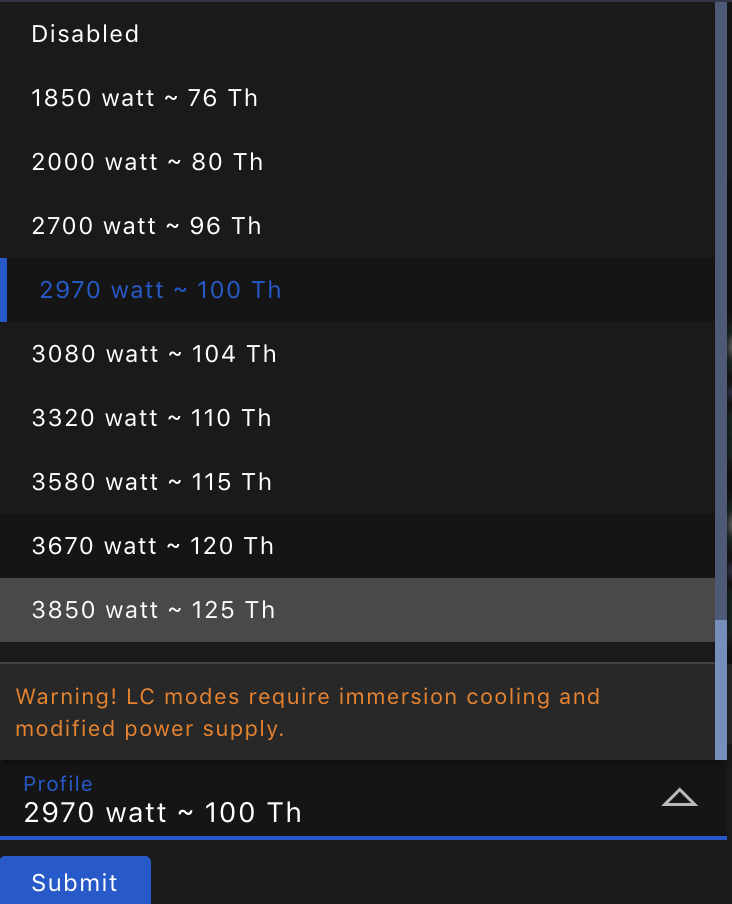
Power Adjustment If your ASIC allows for power settings this function will allow you to adjust without having to log into the device via another browser window. Below are screen captures of Whatsminer and Antminer running Vnish firmware. Make sure the worker User is connected and there are no Authorization Errors. Select the appropriate power mode, wattage or profile for Antminer.
Rails – is previously discussed above. Note you must have a Rail setup to use this function. A more detailed breakdown in configuration is provided in the Knowledge base Center.
Blink LED – This request will allow you to blink the LED of the worker. This is helpful if you are unsure of its location and have not configured a Site Map.
PDU Outlet – If your smart PDU is connected via Agent you can select the appropriate PDU here. This will map PDU ports to the worker to send on/off commands for that specific plug that the miner is plugged into.

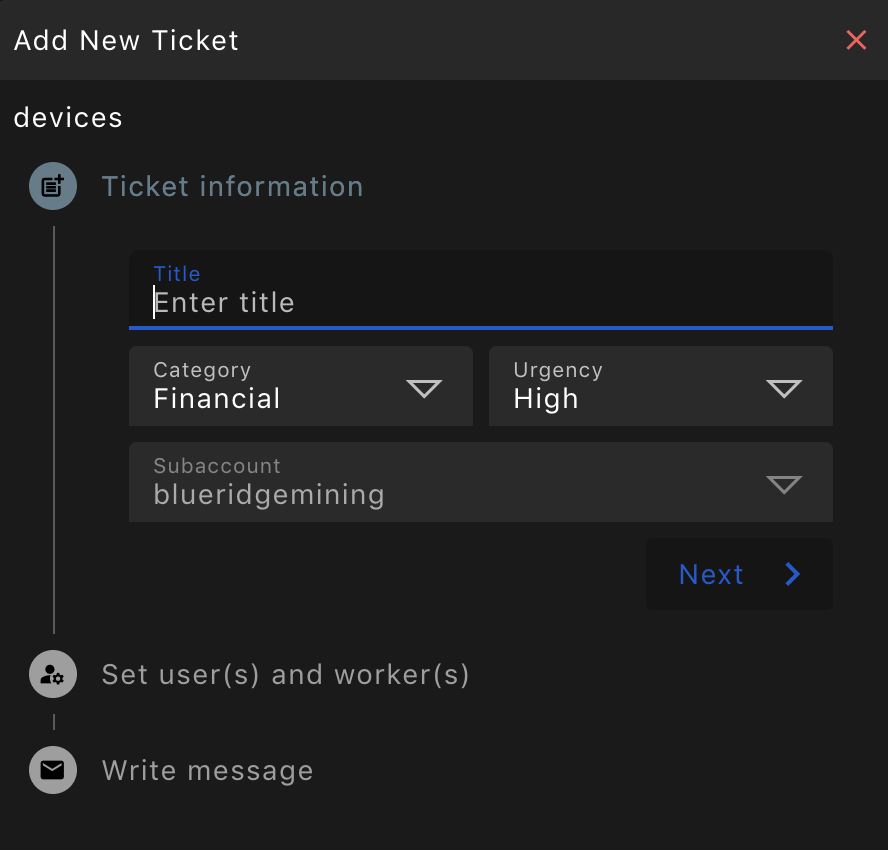
Ticket – This function allows management or a technician to open a trouble ticket. This will be covered in further detail in the knowledge base center
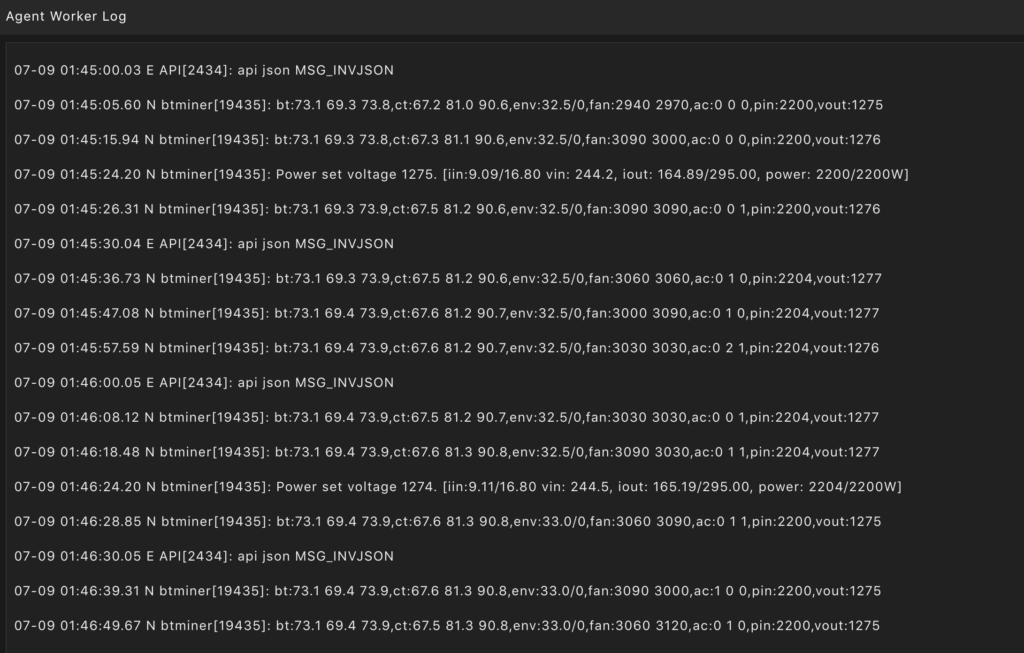
Read Log – Allow the user to view a snapshot of the System Logs. If you have trouble pulling the logs check to make sure there is not an authorization error. Select User Info and input login and password.
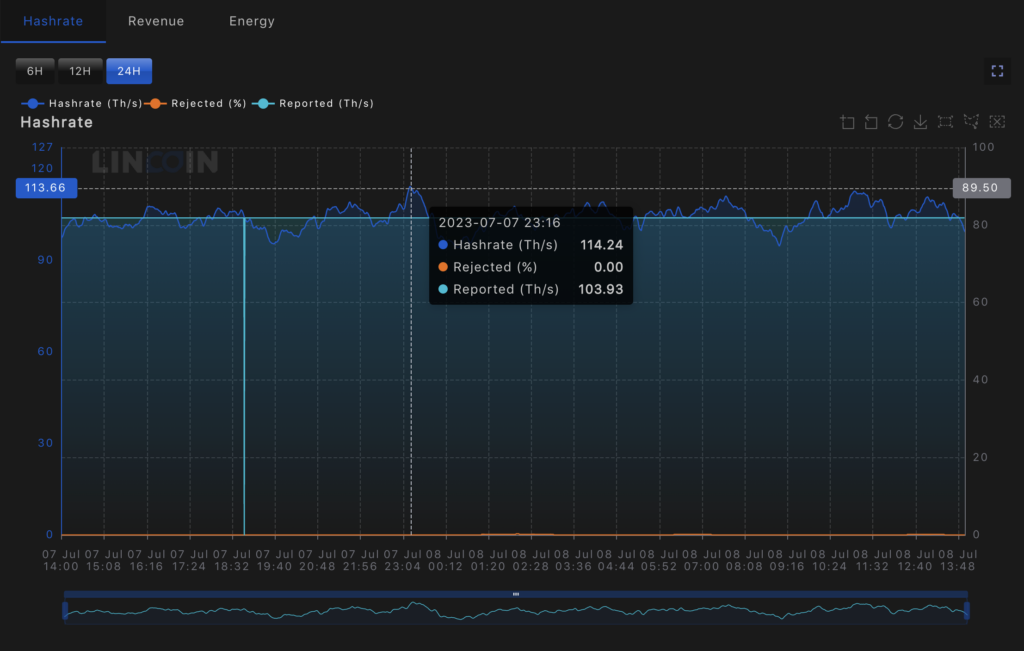
Show Chart – This function allows you to view the workers Hashrate, Revenues, and Energy consumption. Depending on the information available from API data.
Delete – This function deletes unwanted or inactive users. If you delete in error, rescan Agent with the IP address or range.

